
Recipe Science and Culinary Logs
🧪 The Chemistry of the Perfect Lacey Crepe
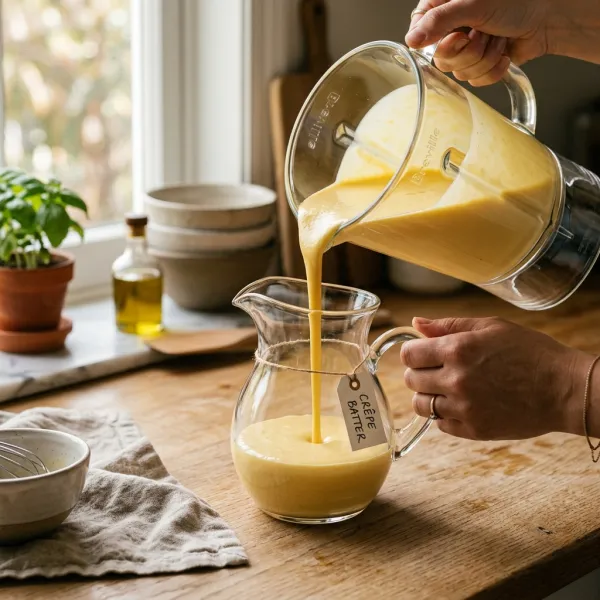
Achieving a paper-thin, tender crepe that melts in your mouth—rather than a tough, rubbery pancake—rests on a fundamental concept of baking chemistry: gluten relaxation and starch hydration. When you blend eggs, milk, and flour, you vigorously develop a strong network of gluten proteins. If you cook the batter immediately, the active gluten binds tightly, resulting in rubbery, thick crepes that tear when swirled. Resting the batter in the refrigerator for at least 30 minutes lets those elastic gluten bonds relax, allowing the flour starches to swell and absorb liquid. This chemical pause yields a fluid, relaxed batter that flows effortlessly in the pan, baking into a razor-thin, delicate lace.
📝 From the Test Kitchen: Our Testing Logs
We cooked over 50 crepes in various skillets to define the foolproof testing checklist:
- Trial 1 (Tear and Stick): We used a stainless steel skillet with cold butter, cooking immediately after mixing. Result: The crepes immediately stuck to the pan, tore into scrambled pieces when flipped, and tasted tough and rubbery.
- Trial 2 (The Thick Pancake): We did not rest the batter and used a standard ladle, pouring about 1/2 cup of batter. Result: The batter was too thick and set before we could swirl it, producing heavy, thick pancakes rather than delicate crepes.
- Trial 3 (Flawless Lacy Perfection): We rested the blended batter for 30 minutes in the fridge. We heated a quality 10-inch non-stick skillet over medium heat, lightly brushed it with melted butter, and poured exactly 1/4 cup of batter, swirling instantly. Result: Razor-thin, lacy-edged crepes that flipped effortlessly and folded like delicate silk.
🍳 Kitchen Equipment Checklist
- 10-inch Non-Stick Skillet: A premium, flat non-stick frying pan or specialized crepe pan is absolute mandatory to allow seamless flipping without tearing.
- High-Speed Blender: The easiest way to secure a perfectly smooth, lump-free batter in under 15 seconds.
- 1/4 Cup Measure or Ladle: Crucial to portion exactly the right amount of batter—any more will result in thick crepes.
- Thin Silicone Spatula: An offset or thin silicone spatula is ideal to slide under the delicate edges without scratching the pan.
⚠️ Troubleshooting & Playbook
The First Crepe Rule: Expect the very first crepe to turn out imperfectly! This is normal as the pan adjusts to the butter and heat levels. Use it as a test run to check pan temperature.
Stacking & Storing: Stack cooked crepes directly on a warm plate. They will not stick together once cooked! Cover the stack with a clean kitchen towel to keep them warm and soft.
Our Step-By-Step Cooking Guide
Follow these meticulously documented, kitchen-tested instructions to secure perfect results on your first attempt:
-
Step 1
Add eggs, milk, water, flour, melted butter, sugar, vanilla, and salt to a high-speed blender and blend for 15 seconds until completely smooth. Cover and chill in the refrigerator for at least 30 minutes to let the gluten relax and starches fully hydrate.
-
Step 2
Heat a 10-inch non-stick skillet or crepe pan over medium heat and brush lightly with melted butter. Pour exactly 1/4 cup of batter into the center of the pan, and immediately swirl in a circular motion to coat the bottom in a razor-thin layer.

-
Step 3
Cook for 60 to 90 seconds until the edges turn golden and curl slightly, and the bottom is specked with gold. Slide a thin spatula under the crepe, gently flip, and cook the second side for 20 to 30 seconds. Transfer to a warm plate.


Magnificent! I followed the resting instruction strictly and the batter was so relaxed. Crepes were razor thin and did not tear at all. Merci!