
Recipe Science and Culinary Logs
🧪 The Chemistry of Carbon Dioxide and Lactic Acid
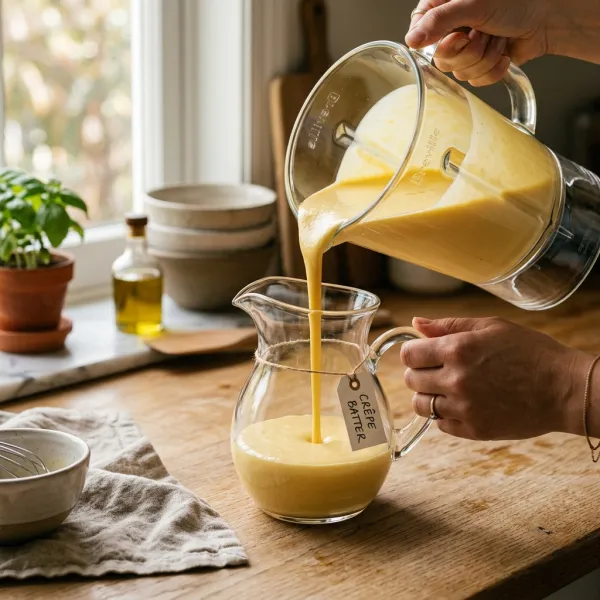
A flawless pancake should be incredibly thick, light, and cloud-like, rather than flat and rubbery. Creating this high rise depends entirely on a fast chemical reaction and a relaxed protein structure:
- The Acid-Base Lift: When acidic buttermilk (which contains lactic acid) meets alkaline baking soda (sodium bicarbonate), they react instantly to release carbon dioxide ($CO_2$) gas. This creates millions of microscopic bubbles in the batter.
- Thermal Expansion: When the batter hits a hot griddle, these trapped gas pockets expand rapidly, inflating the pancake. At the same time, the egg and wheat proteins coagulate around the bubbles, baking them into a solid, airy sponge.
- Relaxing the Gluten: Gluten is formed when flour proteins absorb water and are stirred. Over-mixing creates tight, elastic gluten sheets that trap gas too firmly, making the pancakes tough and rubbery. Leaving small lumps in the batter prevents gluten development, ensuring the pancakes remain tender and delicate.
📝 From the Test Kitchen: Our Testing Trials
We griddled dozens of test pancakes to find the exact ratio for fluffiness:
- Trial 1 (Thin and Chewy): We used standard whole milk instead of buttermilk, and whisked the batter aggressively until it was completely smooth. Result: The pancakes rose very little, had no chewiness, and felt rubbery like rubber discs because of the lack of acid and high gluten development.
- Trial 2 (The Soapy Baking Soda Mess): We added low-acid whole milk but threw in 1 teaspoon of baking soda to force a rise. Result: The pancakes rose slightly but had a bitter, metallic, soapy taste because there was no acid to neutralize the alkaline soda.
- Trial 3 (Cloud-like Buttermilk Fluff): We combined flour, sugar, baking powder, and a touch of baking soda. We gently folded in real low-fat buttermilk, melted butter, and room-temperature eggs, leaving small visible lumps of dry flour in the batter. We rested the batter for exactly 10 minutes to hydrate the starch and let bubbles form before griddling at 375°F (190°C). Result: Beautifully tall, golden-brown, exceptionally light and fluffy pancakes that absorb maple syrup like a sponge!
🍳 Test Kitchen Equipment Checklist
- Non-Stick Griddle or Large Cast-Iron Skillet: Cast-iron has outstanding heat retention, distributing heat uniformly across the surface for beautiful, even browning.
- Thin Metal or Silicone Spatula: Wide enough to slip under the pancake easily and flip it in one clean motion without deflating the rising structure.
- Wire Sifter: Essential to aerate the dry ingredients and distribute the baking powder and soda evenly, preventing pockets of unreacted leavener.
⚠️ Common Pitfalls & Baker's Playbook
The Over-Mixing Trap: A smooth pancake batter is a ruined pancake batter! Stop mixing when you still see small lumps and dry streaks. These lumps will dissolve naturally as the batter bakes, leaving you with a tender, melt-in-your-mouth crumb.
The Rest is Mandatory: Let the batter rest for exactly 10 minutes. This gives the starch molecules time to absorb liquid (hydrating the flour) and lets the double-acting baking powder release its first wave of bubbles, creating a thick, mousse-like batter.
Our Step-By-Step Cooking Guide
Follow these meticulously documented, kitchen-tested instructions to secure perfect results on your first attempt:
-
Step 1
In a large bowl, sift together the all-purpose flour, granulated sugar, baking powder, baking soda, and fine sea salt. Sifting is crucial to break up any lumps and evenly distribute the chemical leavening agents.
-
Step 2
In a separate medium bowl, whisk together the room-temperature buttermilk, melted unsalted butter, eggs, and pure vanilla extract until uniform. Having ingredients at room temperature prevents the melted butter from re-solidifying into cold flecks.

-
Step 3
Pour the wet ingredients into the dry ingredients. Using a rubber spatula, fold the ingredients together very gently, just until the dry flour streaks disappear. Do NOT over-mix! The batter should be thick and contain small lumps. Let the batter rest undisturbed for 10 minutes at room temperature; you will see millions of small bubbles form on the surface.

-
Step 4
Heat a large non-stick griddle or cast-iron skillet over medium heat until it registers exactly 375°F (190°C) or until a drop of water dances on the surface. Brush a paper towel dipped in neutral oil lightly over the surface to create a micro-thin film.
-
Step 5
Scoop 1/3 cup of rested batter onto the griddle for each pancake. Cook undisturbed for 2 to 3 minutes until bubbles form on the surface, the edges look dry and matte, and the bottom is golden-brown. Gently flip and cook the other side for another 1 to 2 minutes until puffed and cooked through. Serve hot with real maple syrup and fresh butter!
The 10-minute rest trick is an absolute game-changer! The batter became so thick and airy, and the pancakes puffed up beautifully on the griddle to nearly an inch thick! They are so soft and pillowy. Simply outstanding!