
Recipe Science and Culinary Logs
🧪 The Science of the Ultra-Crispy, Fluffy Waffle
Most waffle recipes produce a result that is either crispy but dense, or fluffy but soggy. Achieving both simultaneously requires understanding two pieces of food science. First, using melted butter instead of oil: butter contains milk solids that brown and caramelize against the hot iron, creating that deeply golden, complex-flavored crust. Second, and most critically, whipping egg whites to stiff peaks and folding them separately into the batter introduces millions of tiny air pockets. In the sealed, pressurized waffle iron, these bubbles rapidly expand under heat, creating a dramatically light, honeycomb-like interior structure. Additionally, using buttermilk activates the baking soda through an acid-base reaction, producing carbon dioxide for extra rise. The result is a waffle with a shattering-crisp exterior and an airy, cloud-like interior that holds its shape without going soggy.
📝 From the Test Kitchen: Our Testing Logs
We made over two dozen batches of waffles to perfect this recipe. Here is what we learned:
- Trial 1 (Dense & Soggy): We mixed whole eggs directly into the batter without separating. Result: The waffles were dense, chewy, and steamed rather than crisped. The exterior turned pale and soft within 2 minutes of coming off the iron.
- Trial 2 (Crispy but Hollow): We used all baking powder without baking soda and vegetable oil instead of butter. Result: The waffles were structurally crispy but lacked flavor depth. The interior was oddly hollow and gummy — too much lift without enough structure.
- Trial 3 (Absolute Perfection): We separated the eggs, whipped the whites to stiff peaks, used a combination of buttermilk (for baking soda reaction) and baking powder (for consistent rise), and used melted browned butter for rich caramel notes. We folded the airy whites gently in three stages to preserve maximum air. Result: Waffles with a shatteringly crisp, deep gold crust that stayed crispy for 10 minutes and a pillowy, custardy interior with visible honeycomb air pockets. Absolutely unreal.
🍳 Kitchen Equipment Checklist
- Belgian Waffle Iron: A Belgian waffle iron with deep-grid pockets (at least 1 inch deep) creates the deep wells that hold maple syrup perfectly. We recommend Cuisinart or Breville models.
- Stand Mixer or Hand Mixer: For whipping egg whites to stiff, glossy peaks quickly. A stand mixer frees your hands to prepare the batter base simultaneously.
- Two Large Mixing Bowls: One for the wet batter base and one for whipping the egg whites — they must be completely clean, dry, and grease-free for whites to whip properly.
- Wide Ladle or Cup Measure: To pour an exact, measured amount of batter onto the iron surface for uniform waffles every time.
⚠️ Common Pitfalls & Reheating Playbook
The #1 Mistake — Over-mixing: Once the whipped egg whites are folded into the batter, stop mixing immediately when the last streaks of white disappear. Over-mixing deflates all the air bubbles you worked hard to create, resulting in flat, dense waffles.
Reheating Playbook: Never microwave waffles — they become rubbery and steamed. Instead, place leftover waffles directly on the rack of your toaster oven or regular oven at 375°F (190°C) for 5 minutes. The direct radiant heat from the rack perfectly re-crisps both sides without any sogginess. They taste as if freshly made!
Our Step-By-Step Cooking Guide
Follow these meticulously documented, kitchen-tested instructions to secure perfect results on your first attempt:
-
Step 1
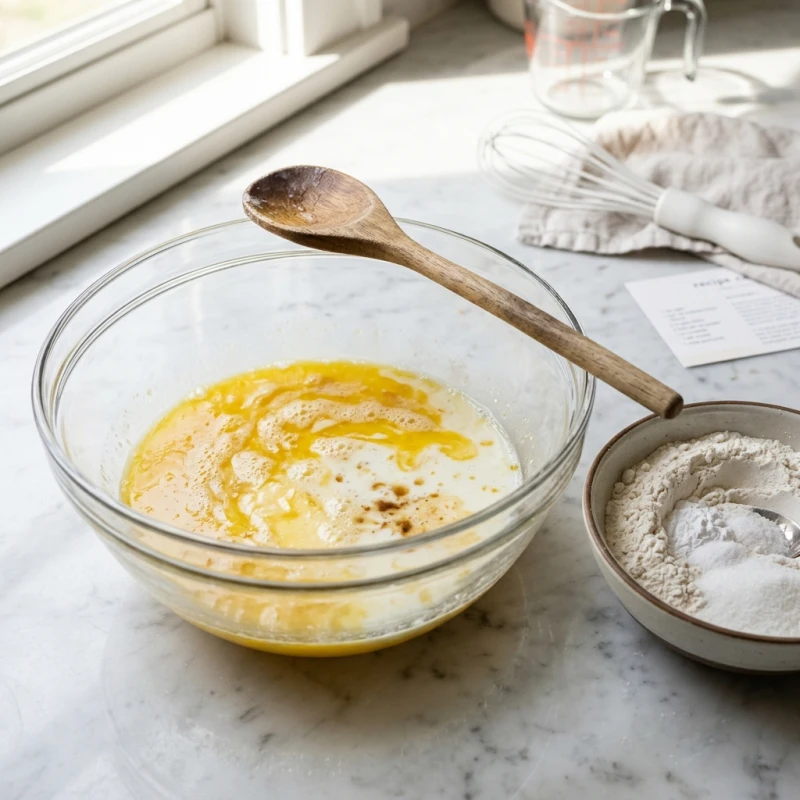
In a large bowl, whisk together the flour, baking powder, baking soda, sugar, and salt. In a second bowl, whisk egg yolks, buttermilk, melted browned butter, and vanilla extract until smooth. In a third clean, grease-free bowl, use a hand mixer or stand mixer to whip the egg whites to stiff, glossy peaks — they should hold their shape when the beater is lifted. Gently fold the egg yolk mixture into the dry ingredients until just combined with a few small lumps remaining.
-
Step 2
Using a large silicone spatula, fold the whipped egg whites into the batter in three stages, cutting through the center and sweeping from the bottom in a J-motion. Stop folding the moment the white streaks disappear — do not over-mix. Preheat your Belgian waffle iron to its highest heat setting and brush both plates lightly with melted butter using a pastry brush.

-
Step 3
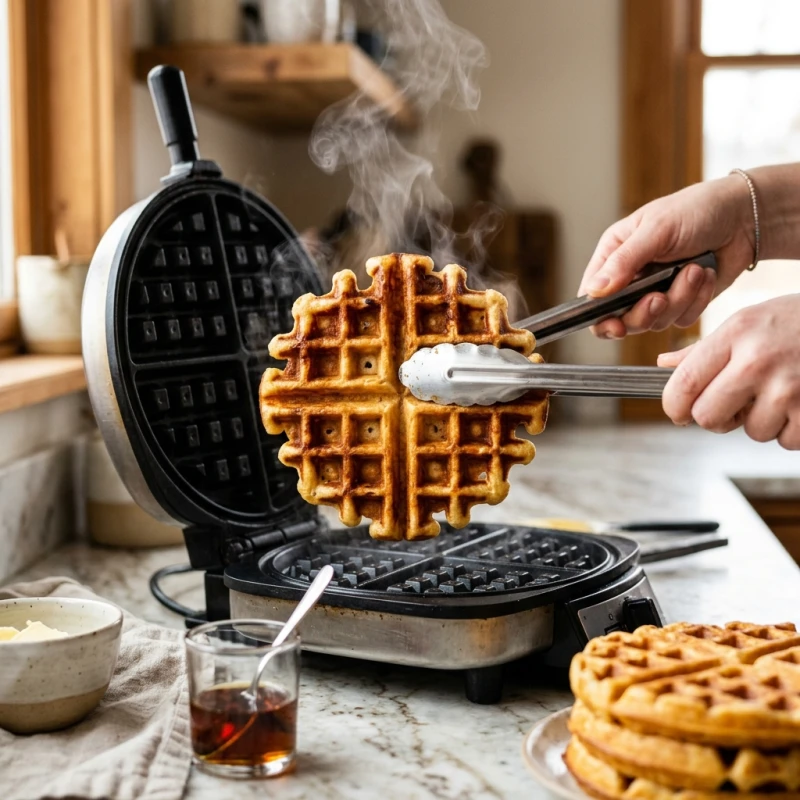
Pour enough batter (roughly 3/4 cup) to fill your waffle iron about 80% full, close the lid firmly, and cook for 4 to 5 minutes until the steam stops escaping from the sides and the indicator light signals ready. Do not open the iron early — the steam finishing is your cue. Remove the waffle to a wire rack (not a plate, which traps steam and softens the crust). Serve immediately with warm maple syrup, a pat of butter, and fresh berries. To keep waffles crispy while cooking multiple batches, hold them in a 225°F (107°C) oven directly on the oven rack.

I have been searching for the perfect waffle recipe for years and this is finally it. The whipped egg white technique is a total game-changer — the waffles stayed crispy for a full 15 minutes! My whole family requested these every weekend now.